Now upload the BirdTalk data from your phone to the eBird web site. We'll walk you through the process, below.
If you are already know how, click the link in Step 2 below to get right into it.
If this is your first-time
These instructions are lengthy, but take heart!
Once you've done it a couple times, this whole process will take less than a minute.
Step 1: Make sure these instructions are handy, so you can consult them
as you work through the eBird import page on your phone.
You'll want to either:
- View this page on your computer by typing this URL in your browser: membot.com/btupload.html, or
- Print out this page, or
- Switch back and forth to this instruction page using the forward and back buttons,
as you work through the eBird page.
This option is only recommended for techie users, as it is more difficult.
Step 2: On your phone, click this link to open eBird's File Import web page.
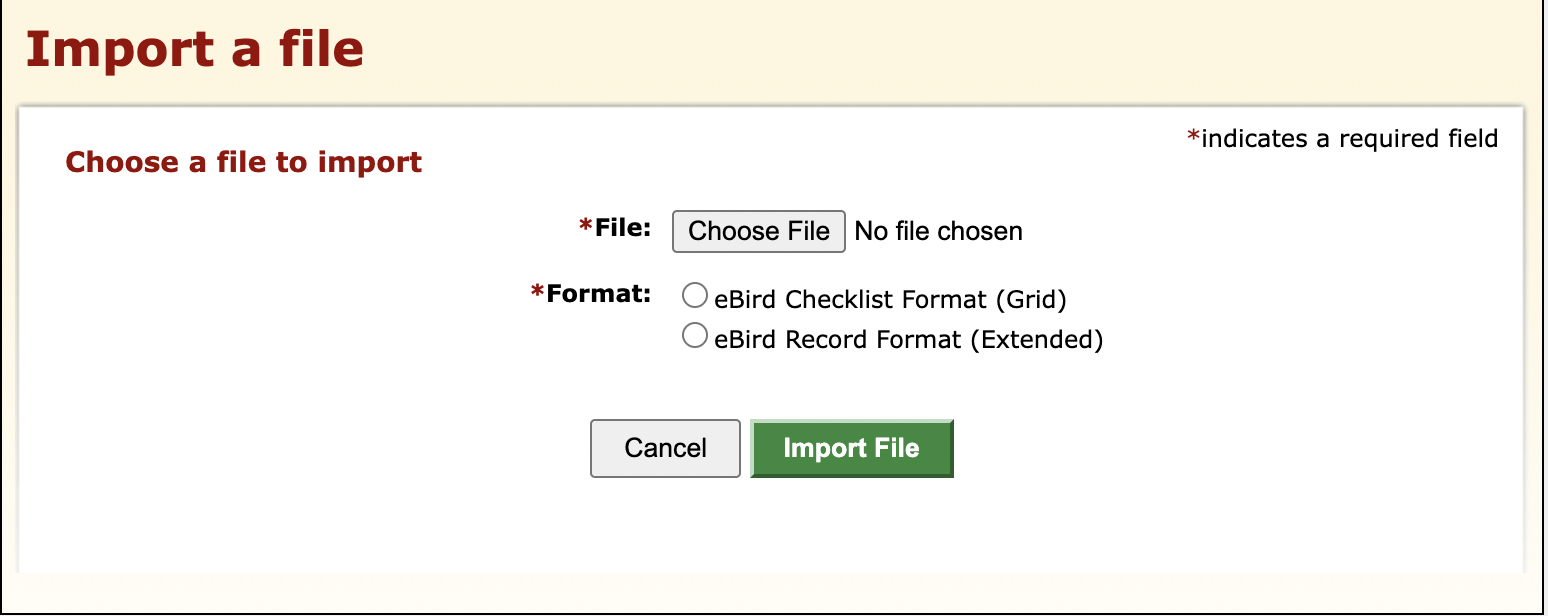 eBird page for uploading a checklist
Step 3: The font on eBird's page is incredibly small on a phone.
Pinch-out to enlarge the page so you can tap the buttons more accurately.
Step 4: Tap the *File: Choose File button.
Step 5: A menu will come up with several choices. Ignore the photo choices and tap the bottom one, Choose File.
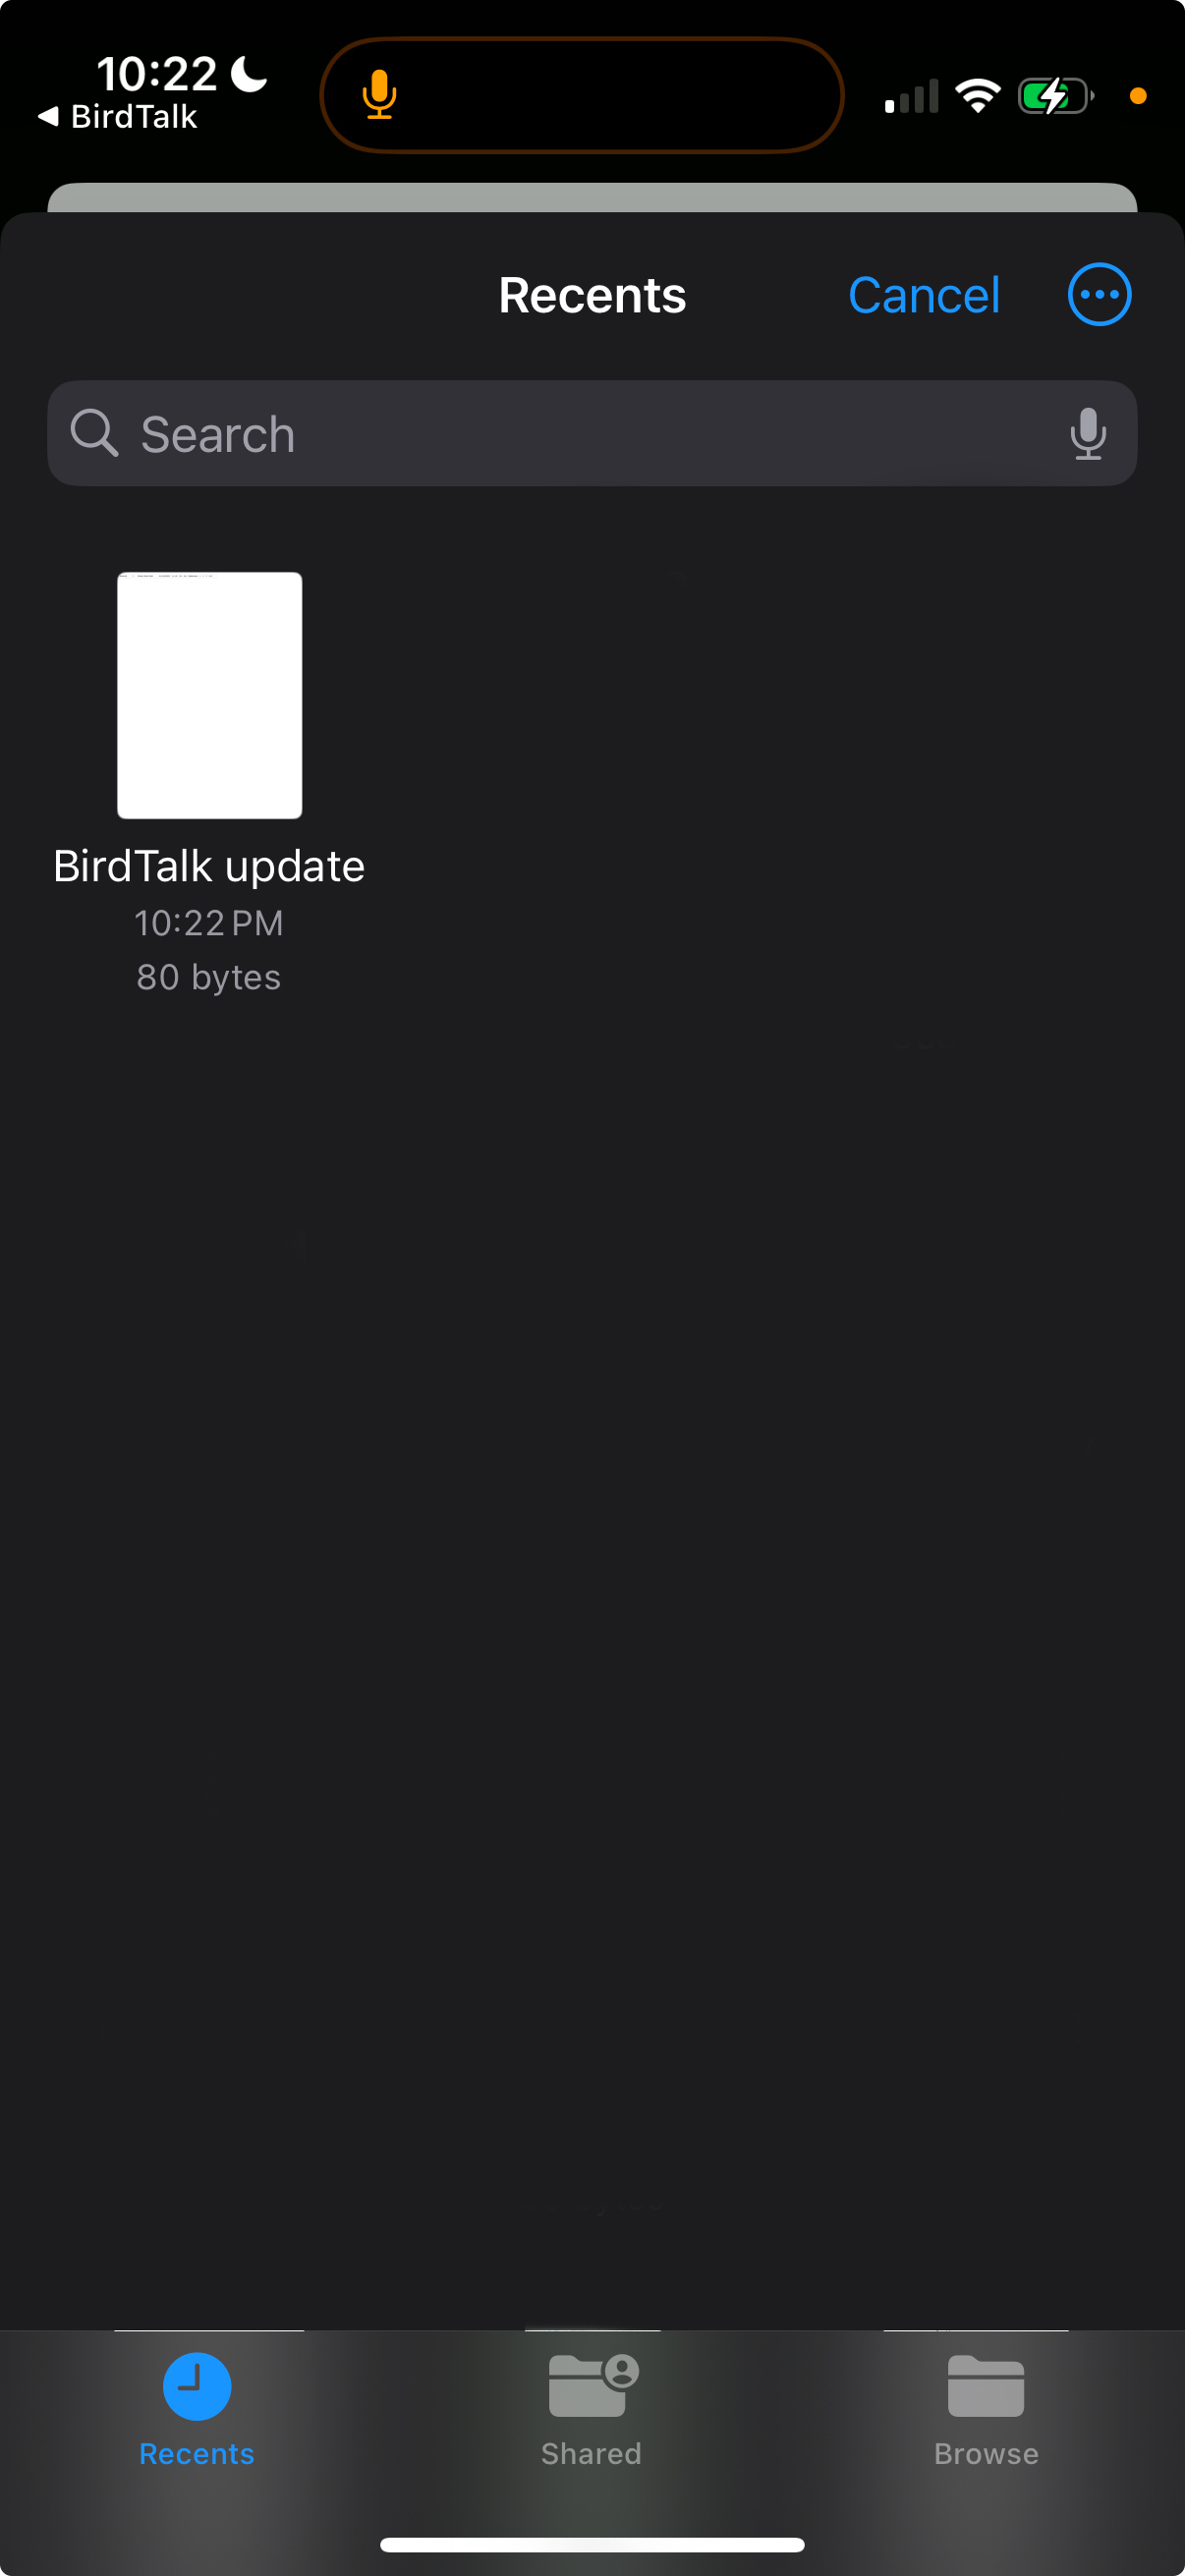 iPhone screen: Choose file
Step 6: A file-chooser screen appears, entitled
Recents. There may be many files shown, but focus on the top left one. It will say
BirdTalk update, below a picture of a white page of text (possibly looking like a blank page).
Tap on that upper-left white page. Note that tapping on the file name itself won't work -- you have to tap the picture of a text page right above the file name.
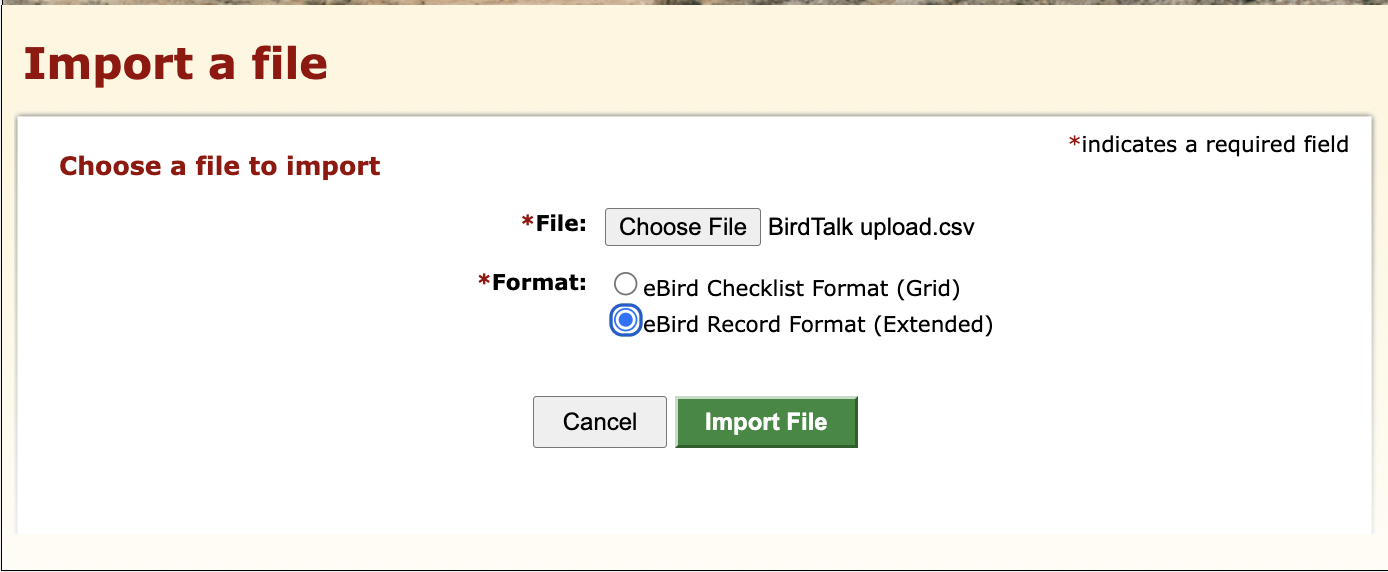 eBird's import page with Fileand Format filled in
Step 7: Now you'll be back at the eBird
Import a file page. There, to the right of the
Choose File button, the words
No file chosen may take a short while to change to
BirdTalk update.csv. If it still says
No file chosen after 15 seconds, go back to step 4 and proceed again from there to choose the file.
Step 8: The next line down has two choices for *Format:. Tap the lower circle to select eBird Record Format (Extended). Note that you have to tap the circle to the left of the words, not the words. When you've done this successfully that circle will be filled in as shown in the image at right.
Step 9: Now that the form is filled out, tap the green Import File button to start the import.
Step 10: The page will show the message "Your file was successfully imported", but you're not yet done! It'll also say something about it processing the import and will say you can come back later; don't believe it!
Wait until it finishes and changes to the
My imports page.
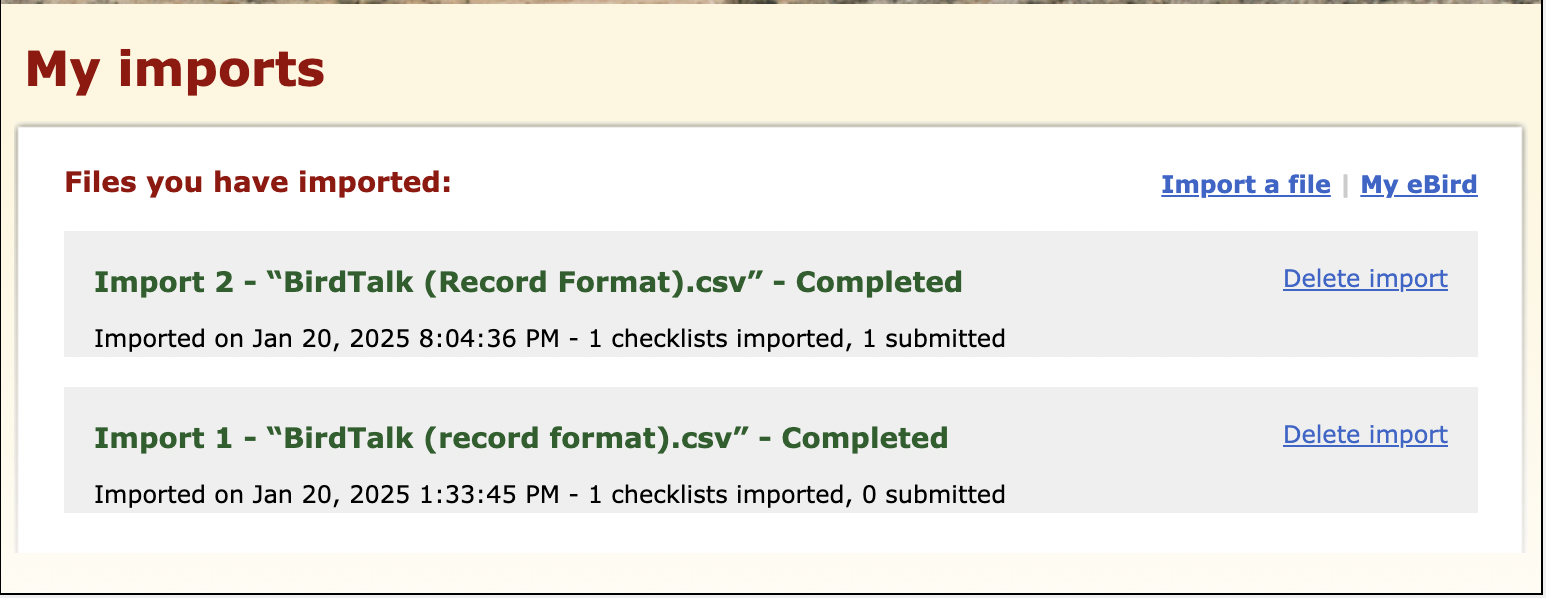 eBird's page showing history of imports
Step 11: On the
My imports page, look at the top entry. See
Import 2 in the example image at right.
The date of that top Import should match the date and time you are doing the upload (note that the date shown will be in the Eastern time zone). This verifies that you're looking at the right entry for the upload you just attempted.
Step 12: At the end of that same line with the date, it says 1 submitted. This should match the number of checklists you are uploading from BirdTalk.
If it shows the right number of checklists submitted, that means the upload succeeded, so you can go on to Step 14.
But if it says 0 submitted, or there was some other problem, then proceed on to Step 13 to see what to do when the upload fails.
Step 13: [If the
import failed] Click
Done at top left to return to BirdTalk, then
click No in the "Upload complete?" box.
This lets BirdTalk know that the checklists didn't upload properly, so you can try again after the problem is fixed.
Then contact stevebt at membot dot com so he can help. Thank you for your feedback, which helps us to improve BirdTalk for everyone.
Step 14: [If the import succeeded] Click Done at top left to return BirdTalk, then click Yes in the "Upload complete?" box.
This lets BirdTalk know that the upload was successful so now those checklists can be marked as completed.